Manta Project
SOLO PROJECT
DURATION: 8 Months (07/23 – 03/24)
MADE WITH: Unity, Blender, Substance Painter
CORE SKILLS:
C# Programming
Rigging
Animation
Modelling
INITIAL PLAN AND DEVELOPMENT
I had been designing a mech in my spare time with the plan to rig and animate it for fun but felt that using it in a game project would be really cool so I began to plan out a game for it.
I had been playing the old Armored Core games at the time and became obsessed with their game design.
The core mechanics of Armored Core revolved around the player controlling a mech that could boost, fly and shoot whilst avoiding enemy fire and targeting enemies using a ‘lockbox’ – A square on the user interface which designated the region in which the players weapons would lock-on to an enemy allowing them to shoot their target. The lockbox itself was a really interesting mechanic with a lot of problems that needed solving to work.
I decided to use an old tutorial I had followed from Sebastien Lague as a template to build off to reuse code and help flesh out the game quickly.
The format was a wave based shooter which I thought would fit the mech theme well.
GAME OVERVIEW
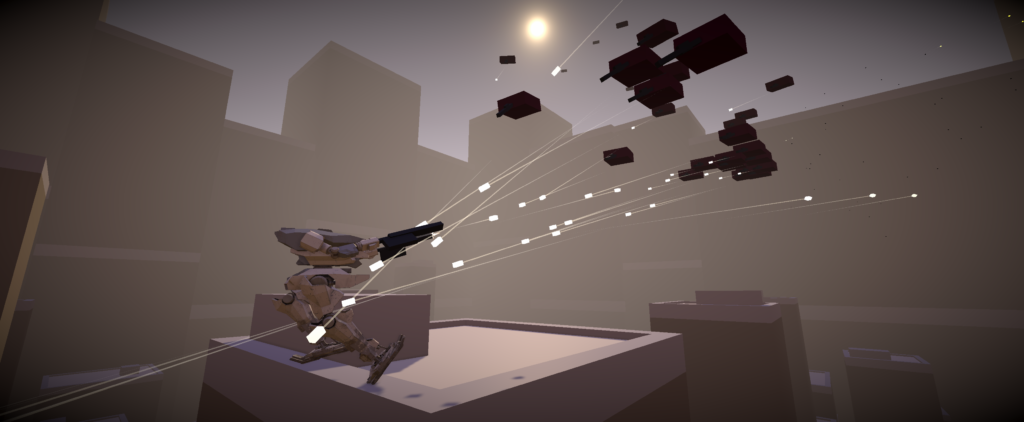
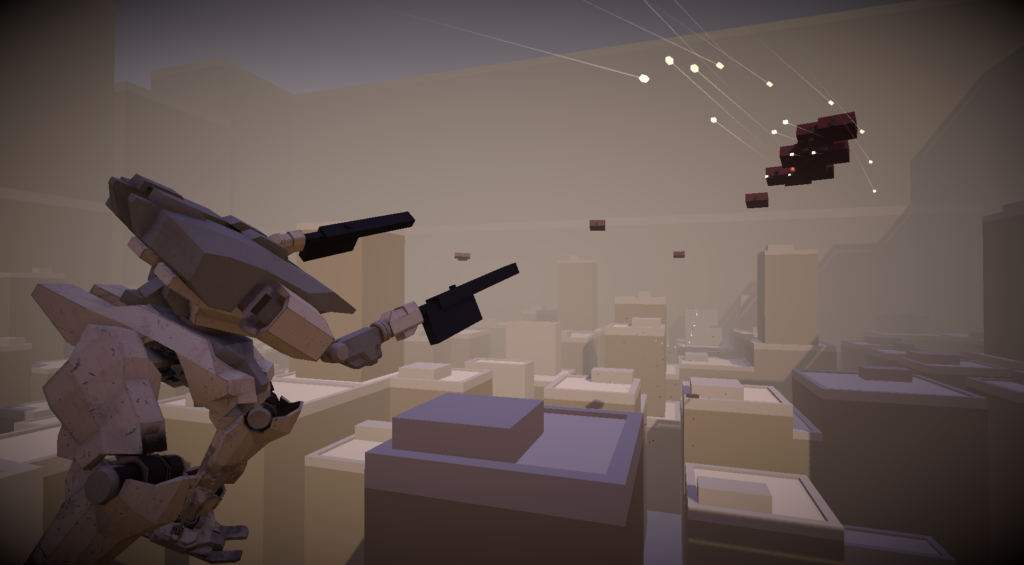
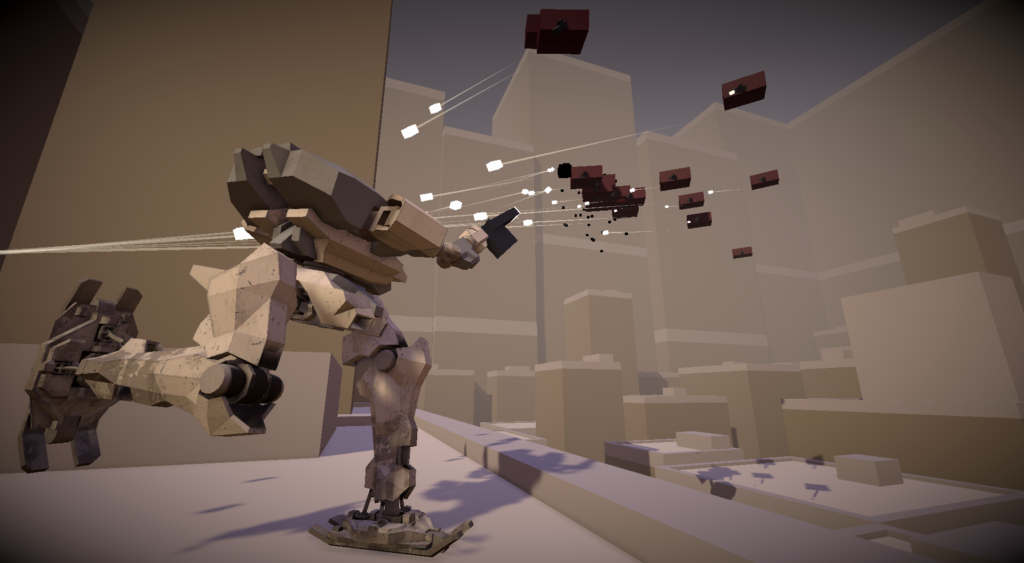
The player will fight through multiple waves of flying drone enemies to survive. With each wave the enemy number grows, increasing the difficulty.
Flawed Foundations
Utilising bits of code I had written before as well as using tutorial code as a template, my goal was to speed up the process of making the game in the 1 month time span. Whilst cobbling pieces together allowed me to get something up and running in good time, modifying and building upon this code became complicated very quickly.
I made a set of primary classes using the name ‘character’ from which it’s child classes would derive, given the name ‘player’ and ‘enemy’. Practising some of the concepts and ideas I had learned, I wanted to try and make a more conscious effort to structure and organise my code. This feels quite heavy handed for only two children and I think would have served me better on a larger scale.
I became much more comfortable passing data between scripts but at times also struggled to find which script a method lived in or where it was being called. This was another reason I think I would have benefitted building it myself as I was trying to fit in and work around another persons code which didn’t always feel intuitive – but on the other hand it was similar to working in a team with another person’s code. An impromptu team game jam without another team member.
using System.Collections;
using System.Collections.Generic;
using UnityEngine;
using UnityEngine.SceneManagement;

public class EnemyManager : CharacterManager
{
    [HideInInspector] public GunController gunController;
    [HideInInspector] public EnemyFlightManager enemyFlightManager;
    [HideInInspector] public EnemyTargetingManager enemyTargetingManager;


    protected override void Awake()
    {
        base.Awake();
        enemyTargetingManager = GetComponent<EnemyTargetingManager>();
        enemyFlightManager = GetComponent<EnemyFlightManager>();
        gunController = GetComponent<GunController>();
    }

    public void Start()
    {
        gunController.EquipGun(0);
    }

    protected override void Update()
    {
        if (gameObject == null)
            return;
        base.Update();

        enemyFlightManager.HandleAllMovement();
        enemyTargetingManager.HandleAllTargeting();
        if (GameManager.instance.gameOver)
        {
            Kill();
        }
    }

    public override void TakeDamage(Vector3 hitPoint, Vector3 hitDirection)
    {
        if (gameObject == null)
            return;
        base.TakeDamage(hitPoint, hitDirection);
    }
    protected override void Die()
    {
        if (gameObject == null)
            return;
        base.Die();
         Destroy(gameObject);

    }
    void Kill()
    {
        if (gameObject == null)
            return;
        Destroy(gameObject);
    }
}
using System.Collections;
using System.Collections.Generic;
using UnityEngine;

public class PlayerManager : CharacterManager
{
    public static PlayerManager instance;
    [HideInInspector] public PlayerAnimatorManager playerAnimatorManager;
    [HideInInspector] public PlayerLocomotionManager playerLocomotionManager;
    [HideInInspector] public PlayerStatsManager playerStatsManager;
    [HideInInspector] public GunController gunController;
    [HideInInspector] public PlayerControls playerControls;

    protected override void Awake()
    {
        base.Awake();
        playerLocomotionManager = GetComponent<PlayerLocomotionManager>();
        playerAnimatorManager = GetComponent<PlayerAnimatorManager>();
        playerStatsManager = GetComponent<PlayerStatsManager>();
        gunController = GetComponent<GunController>();

        if (instance == null)
        {
            instance = this;
        }
        else
        {
            Destroy(gameObject);
        }
    }

    public void Start()
    {
        PlayerCamera.instance.player = this;
        PlayerInputManager.instance.player = this;

        maxEnergy = playerStatsManager.CalculateEnergyBasedOnGenerator(power);
        currentEnergy = playerStatsManager.CalculateEnergyBasedOnGenerator(power);

        PlayerUIManager.instance.playerUIHUDManager.SetMaxEnergyValue(maxEnergy);
        gunController.EquipGun(2, 2);

        PlayerUIManager.instance.playerUIHUDManager.SetMaxHitPointsValue(maxHitPointsValue);
    }
    protected override void Update()
    {
        base.Update();
        playerLocomotionManager.HandleAllMovement();
        PlayerUIManager.instance.playerUIHUDManager.SetNewEnergyValue(currentEnergy);
        PlayerUIManager.instance.playerUIHUDManager.SetNewHitPointsValue(currentHitPointsValue);

        //REGEN STAMINA
        playerStatsManager.RegenerateEnergy();
        if (GameManager.instance.gameOver)
        {
            Restart();
        }
    }

    protected override void LateUpdate()
    {
        base.LateUpdate();

        PlayerCamera.instance.HandleAllCameraActions();
        PlayerCamera.instance.HandleLockOn();
    }

    public override void TakeDamage(Vector3 hitPoint, Vector3 hitDirection)
    {
        base.TakeDamage(hitPoint, Vector3.up);
    }

    public void Restart()
    {
        PlayerUIManager.instance.playerUIHUDManager.SetMaxHitPointsValue(maxHitPointsValue);
        currentHitPointsValue = maxHitPointsValue;
        dead = false;
    }
}
AIMING
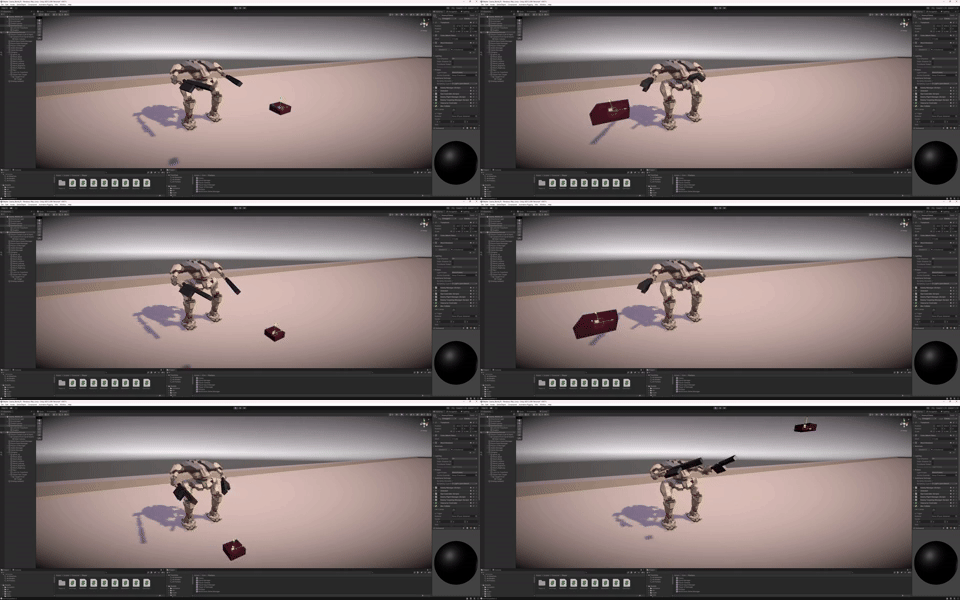
For the player to be able to aim and shoot enemies, the player needed to be able to control the upper body of the mech to face the direction of the camera and the arms needed to align with the enemy to be able to shoot accurately.
I created an empty object called ‘target’. This object is what the arms and guns would align to so the gun’s projectiles would converge to a single point rather than flying uselessly on either side of what the player wanted to shoot.
Using Unity’s multi-aim constraint component, I fed the player camera’s Y rotation into the upper body so when the player looked left or right with the camera, the upper body would follow.
Because the mech’s joints were modelled and rigged with single axis joints, I needed the arms to move and align with the target without breaking the joint rotations. To do that I used multiple multi-aim constraint components, each one targeting a different bone in the arm and constrained to that bone’s axis of rotation.
using System.Collections;
using System.Collections.Generic;
using UnityEngine;

public class PlayerCamera : MonoBehaviour
{
    public static PlayerCamera instance;
    public PlayerManager player;
    public Camera cameraObject;
    public PlayerInputManager playerInputManager;
    [SerializeField] Transform cameraPivotTransform;

    ...

    [Header("Lock-On Settings")]
    public Transform currentLockOnTarget;
    public float maximumLockOnDistance = 500;
    public Transform nearestLockOnTarget;
    List<CharacterManager> availableTargets = new List<CharacterManager>();
    public Vector3 screenPoint;

    ...

    public void HandleLockOn()
    {
        float shortestDistance = Mathf.Infinity;

        Collider[] colliders = Physics.OverlapSphere(player.transform.position, maximumLockOnDistance);

        if (!Physics.CheckSphere(player.transform.position, 100, 6))
        {
            //If no enemies in check sphere clear availableTargets List
            ClearLockOnTargets();
        }

        for (int i = 0; i < colliders.Length; i++)
        {
            CharacterManager character = colliders[i].GetComponent<CharacterManager>();

            if(character != null)
            {
                Vector3 lockOnTargetDirection = character.transform.position  - cameraObject.transform.position;
                float distanceFromTarget = Vector3.Distance(player.transform.position, character.transform.position);
                float viewableAngle = Vector3.Angle(lockOnTargetDirection, cameraObject.transform.forward);

                if (character.transform.root != player.transform.root && viewableAngle > -25 && viewableAngle < 25 && distanceFromTarget <= maximumLockOnDistance)
                {
                    availableTargets.Add(character);
                }
            }
        }
        //Determine the closest target to player and lock on to that target
        for (int k = 0; k < availableTargets.Count; k++)
        {
            float distanceFromTarget = Vector3.Distance(player.transform.position, availableTargets[k].transform.position);

            if(distanceFromTarget < shortestDistance)
            {
                shortestDistance = distanceFromTarget;
                nearestLockOnTarget = availableTargets[k].lockOnTransform;
            }
        }
        if(nearestLockOnTarget != null)
        {
            currentLockOnTarget = nearestLockOnTarget;
            screenPoint = cameraObject.WorldToScreenPoint(currentLockOnTarget.position);
            screenPoint.z = 0;
        }
    }

    public void ClearLockOnTargets()
    {
        availableTargets.Clear();
        currentLockOnTarget = null;
        nearestLockOnTarget = null;
    }
}
I needed the player to be able to lock on to enemies in a central portion of their screen. I did think about having a target switching capability but decided the closest enemy would take aiming priority for simplicity’s sake.
First, colliders within a ‘maximumLockOnDistance’ are added to an array. These colliders’ positions and distances are checked for viability – are they in the centre portion of the screen? If so, then they are added to a list called ‘availableTargets’. When the enemies move out of range and no colliders are detected within the lock-on distance this list is cleared so lock on does not persist outside of the ‘maximumLockOnDistance’.
Using a for loop each target is compared to a ‘shortestDistance’. Each target compared which is closer to the player has its distance set to the ‘shortestDistance’ eventually giving us the closest enemy and ‘nearestLockOnTarget’. This ‘nearestLockOnTarget’ then becomes the ‘currentLockOnTarget’.
‘screenPoint’ is then passed on to the Reticule script component to give the reticule its position on the screen.
When I first implemented the lock on targetting mechanic I made the ‘target’ objects position the same as the ‘currentLockOnTarget’ position. This did exactly what I wanted and the mech pointed it’s guns at the enemy however when that enemy moved, even though the guns would still be aligned with that enemy, by the time the bullets had reached that point in space the enemy had moved on. I needed the target to aim ahead in the direction the enemy was travelling.
To solve this I offset the ‘target’ position by adding the ‘currentLockOnTarget’ velocity to the ‘target’ object’s position. The smaller the distance between the enemy and the player, the less time is required for the projectile to reach its target, so a smaller offset is needed. To emulate this I multiplied the offset by the distance between the player and enemy divided by a maximum distance.
This meant that at max distance the value would be 1 meaning a full offset.
Any distance less than the maximum would be less than 1 meaning a smaller offset tending towards 0 the closer it got to the player.
I also used a raycast to check for collisions when no enemy was present, allowing the guns bullets to always hit the centre of the screen whatever object was in front of it.
A more accurate way of achieving the lock-on targetting would be to also take into account the speed of the gun’s bullet projectile. This would allow projectiles with different speeds to be able to use the same system and still hit the enemy target.
using System.Collections;
using System.Collections.Generic;
using UnityEngine;

public class AimTarget : MonoBehaviour
{

    [Header("Aim Target Settings")]
    [SerializeField] public Transform target;
    [SerializeField] Transform targetPivotTransform;
    float currentAimTargetZPosition;
    LayerMask playerMask;

    private void Start()
    {
        playerMask = LayerMask.GetMask("Player");

        currentAimTargetZPosition = 500f;
    }
    private void Update()
    {
        AimAtTarget();

    }
    public void AimAtTarget()
    {
        Camera cam = PlayerCamera.instance.cameraObject;
        target.transform.rotation = cam.transform.rotation;

        if (PlayerCamera.instance.currentLockOnTarget != null)
        {
            Vector3 displacement = target.transform.position - targetPivotTransform.position;
            float distance = displacement.sqrMagnitude;
            float maxDistance = PlayerCamera.instance.maximumLockOnDistance;
            target.transform.position = PlayerCamera.instance.currentLockOnTarget.position + (PlayerCamera.instance.currentLockOnTarget.parent.GetComponent<GetVelocity>().velocity * (distance / (maxDistance * maxDistance)) * 2);
            Debug.DrawRay(targetPivotTransform.position, target.transform.position - targetPivotTransform.position, Color.red);
        }
        else
        {
            RaycastHit hit;
            Physics.Raycast(cam.transform.position, cam.transform.forward, out hit, currentAimTargetZPosition, ~playerMask);

            if (hit.distance > 0)
            {
                target.transform.position = hit.point;
            }
            else
            {
                target.transform.position = cam.transform.position + cam.transform.forward * currentAimTargetZPosition;
            }

        }
    }

}
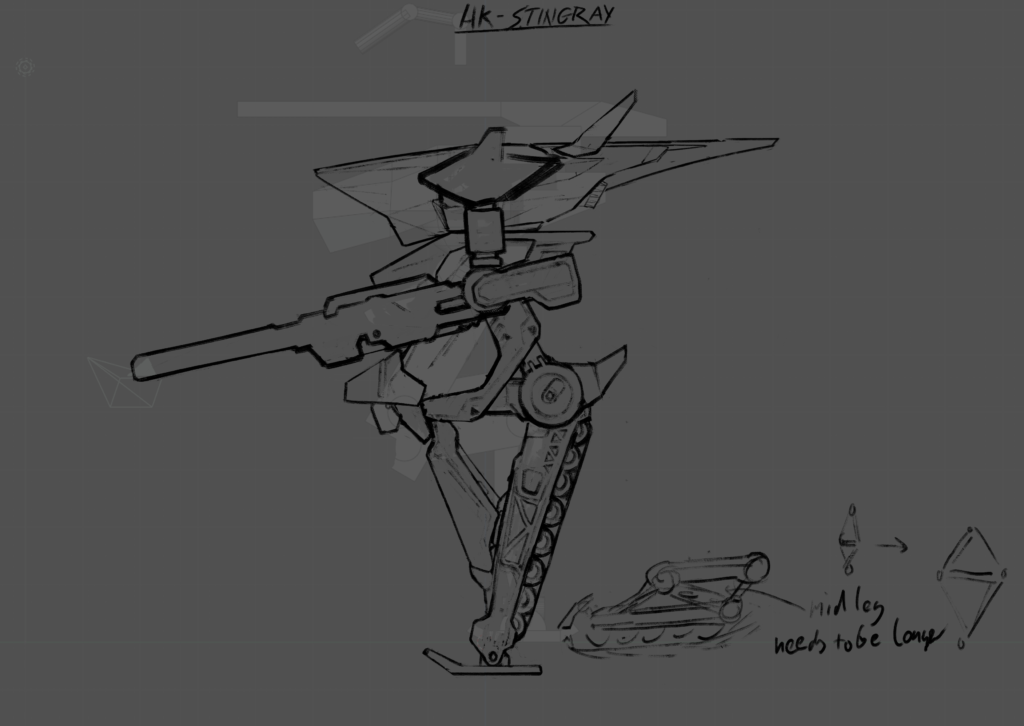
I didn’t want the main mode of movement to be ambulatory. Though mechanical legs are a signature of mechs and I didn’t want to deprive my design of them, in an attempt to keep my machine nimble without it having to sprint about like Usain Bolt I looked to build in a driving function into the legs. The idea was that the mech would fold its legs up and sit on the treds that run on the back side of the lower leg allowing the mech to ‘skate’ on the ground.
Mech Design
Combining elements of jet fighters and tanks I sketched out a body and rotation platform and started to look at how the legs would be constructed – in my mind the most important aspect which would determine how (fast) the mech would move and would lead a large chunk of the mech’s design. I wanted the form to follow the function in this regard.
Final Mech Model
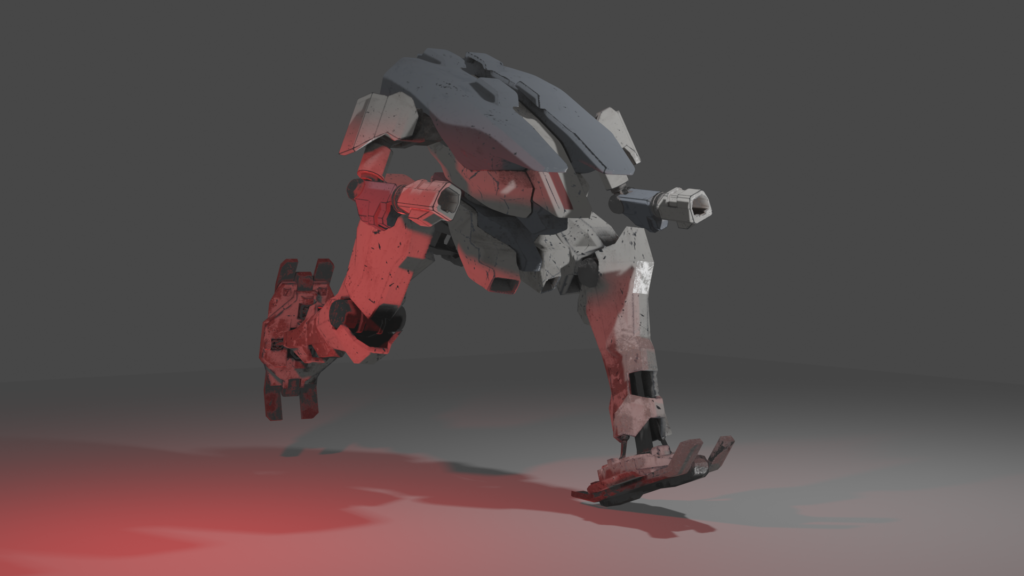
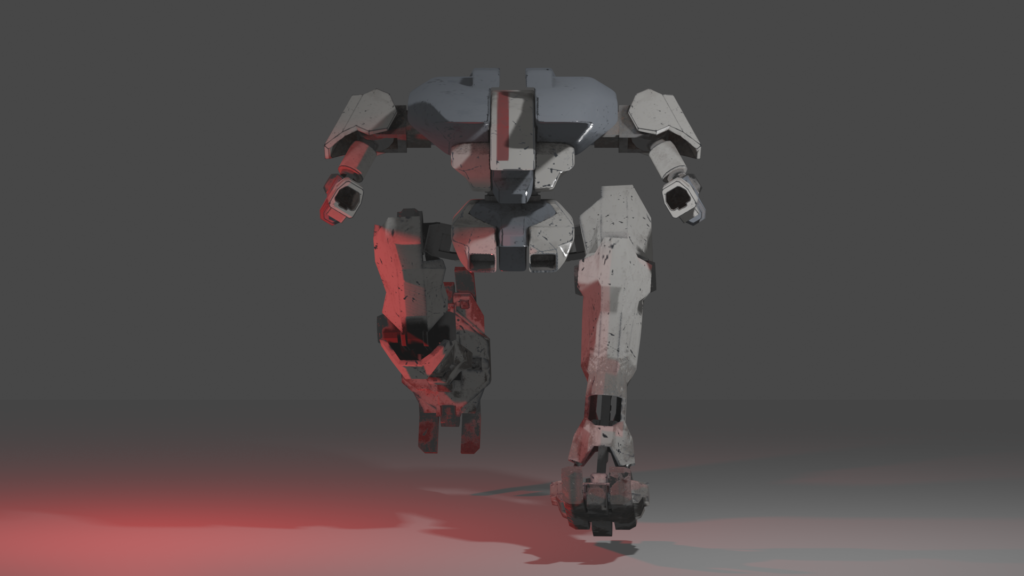
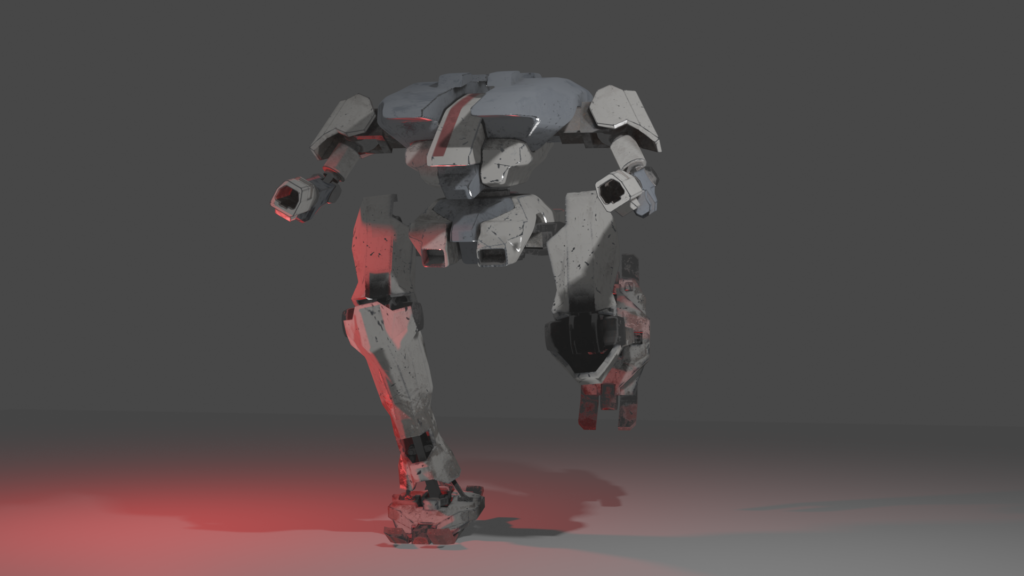
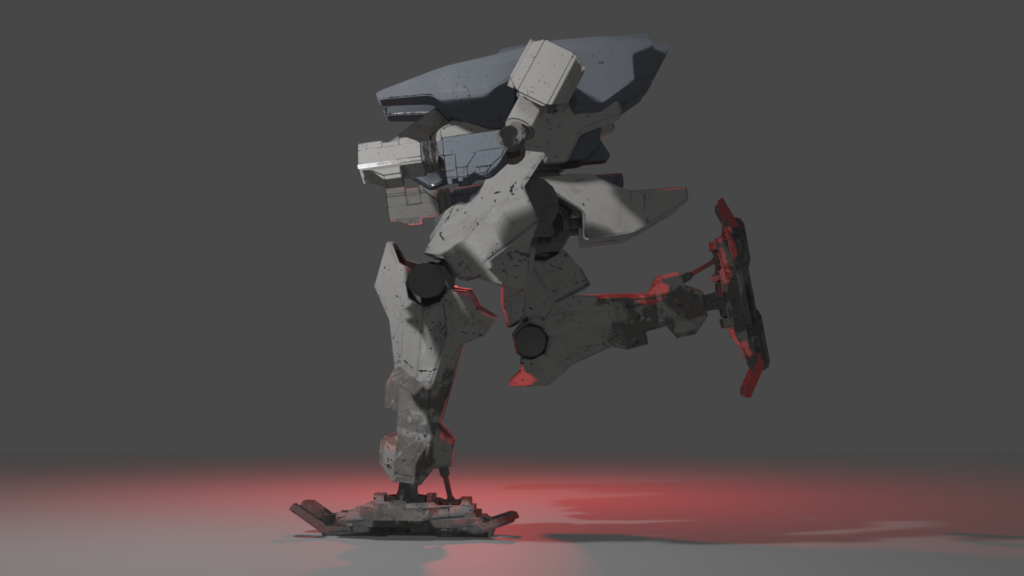
For the final mech model I simplified parts of the design to reduce complexity. The legs became single jointed instead of double jointed and the treads were reworked into the feet. I wanted to give the mech a ‘head’ that would give it a more anthropomorphic feel so I segmented and pitched the centre of the body where you could imagine the cockpit would be.
RIGGING AND ANIMATION
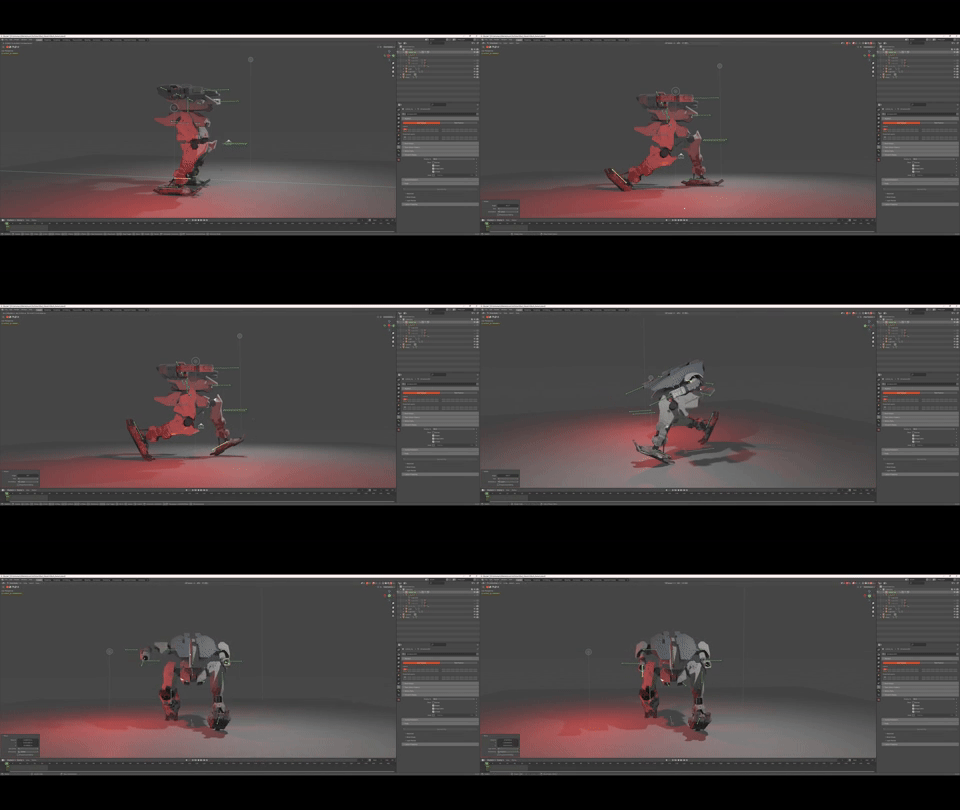
Foot Rig
The foot joint has components which allow it to rotate much like a normal ankle but it needed to be rigged so none of the components intersected or rotated incorrectly.
In addition, I added pistons to explain the mechanics of the foot movement and I needed to rig these so they animated as such.
This was by far the most complex part of the rig with lots of bone constraints and dependencies. I ended up adding additional constraints which limited the range of movement to stop joints from breaking by going past certain points of rotation.
Rigging
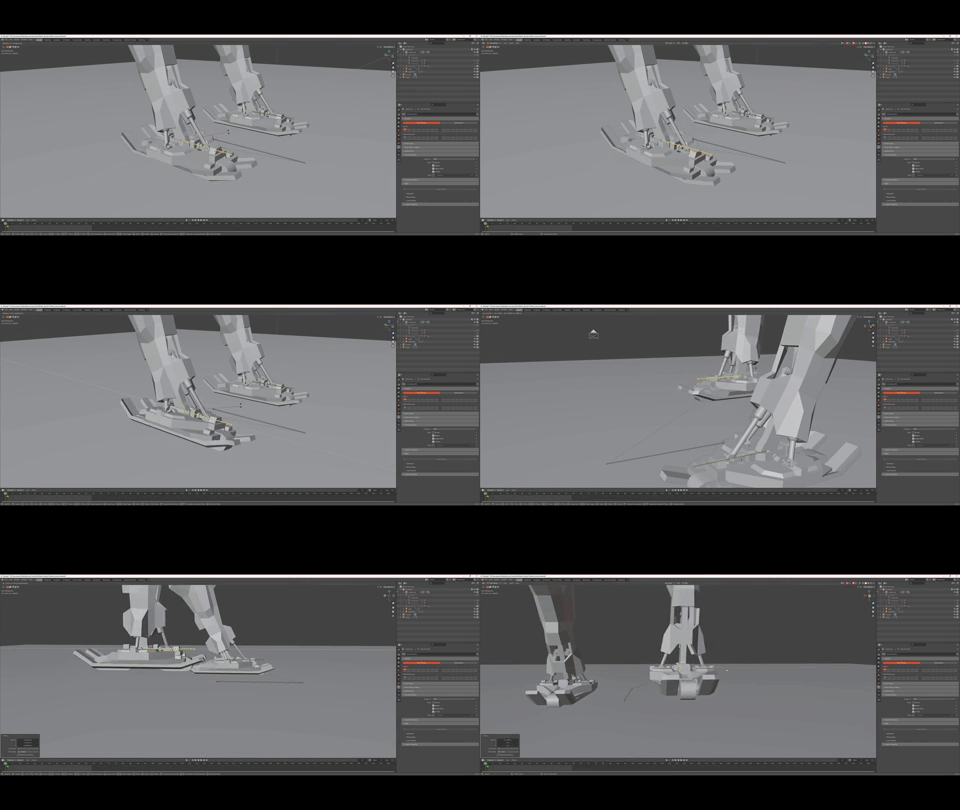
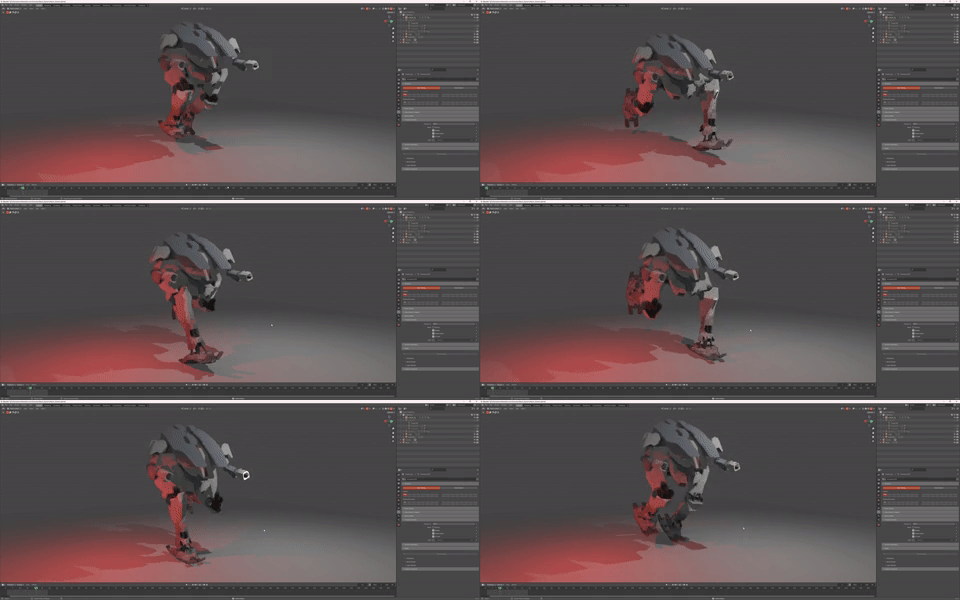
Since the mesh was hard surface, I thought the rigging process would be easy but I had modelled alot of my mech with joints that could only rotate along 1 axis. This meant that only in conjunction with other joints could full range of movement happen.
I wanted to use IK chains like in a human character to make the animating easier but needed to create constraints within the skeleton to keep each joint rotating along one axis of rotation, essentially adding all the joint rotations together to get full rotational movement.
Animation

Out of Scope
Christmas followed soon after and all momentum died.
I hadn’t planned my code out for most of these features and I vastly underestimated how long it would take me to get the basics in. My morale and interest dropped and I wanted to move on to other things, but I needed to at least tie off the project.
CONCLUSION
This project was a combination of tutorials and my own written code and structure. While I thought that this would help speed up the process of making the game it actually made the process of writing my own code more tricky as I needed to not only achieve my own goals with the code but also make them compatible with the tutorial code and in hindsight would have made better progress and probably learned more if I had written all the code by myself.
The mech ended up taking the most amount of time, requiring modelling, rigging, animating and scripting and while I am proud of how it turned out, I underestimated the time investment the mech alone would require.
It’s good to get reminder of the importance of staying within scope and properly planning the work out and managing the load. Had I approached this project from the outset with a larger scope and planned out long term commitment I feel as though the project would be in a much better place and closer to finished rather than relegated to ‘done’.
